Saturday, November 29, 2014

December Daily Mini Scrapbbook

I've tried those daily instagram challenges in the past and I'm just not that good at them. So honestly, this Daily December project makes me nervous. But I'm going to give it a shot. I think it will be a great way to capture my family during the holiday season.


I'm going to allow myself to bend the rules if needed. I'm not really sure if there are "rules" but lets just say I'm going to keep things easy... Meaning, if I have to change up the daily theme once or twice then no big deal. Because I know I will have good intentions to do things like "Christmas cards" on December 9th, but the reality is sometimes our days are crazy and I may end up doing a different theme that day. So my list is purely for inspiration and ideas each day.

In my pre-made album that I put together this week I added 25 page inserts that are front and back so it will actually end up being 50 pages, and since I have two kids I figure that makes sense. I'll have more room for additional pictures and journaling. I have already added the dates but I won't journal or add the daily "theme" until I have added the pictures (in case my daily theme changes).

A 12" x 12" album would have been too overwhelming, so this 6" x 8" is a perfect fit. I really love the Project Life concept. I actually used mostly American Crafts Project Life cards (an assortment from different kits) and I used a Simple Stories blue chevron burlap "Snap" album. I don't always use traditional Christmas colors (I will one of these days for a project) so for this album I used primarily light blue, gold, white and small pops of red. I'm sure I will add additional embellishments when the pictures are in there. Here's a peek at some of the pages...


If you have any additional "December Daily" ideas please leave your ideas in the comments below. If this goes well I will be doing it again next year. I'll do a December Daily "follow up" post in January so you can see the finished book. Happy Holidays!

1. Neighborhood tree lighting.
2. Trimming the tree.
3. Elf on the shelf.
4. Favorite Ornament.
5. Christmas shopping list.
6. Visit with Santa.
7. Christmas Cookies. 
8. Letter to Santa.
9. Holiday cards.
10. December Daily.
11. Christmas stockings.
12. Handmade Christmas decorations.
13. Snow fun.
14. Reading our favorite Christmas story.
15. Hot Cocoa (or coffee).
16. Christmas cards from family and friends.
17. Christmas craziness.
18. Oh What Fun!
19. Christmas treats.
20. Christmas movies.
21. Naughty or nice.
22. Family selfie.
23. Local Christmas decorations.
24. The night before Christmas.
25. Christmas day.

Thursday, November 27, 2014

Vintage Milk Glass Craft Supplies Storage

Just a quick post today since it's a busy week and I'm spending the holiday at a friends house for Thanksgiving. I'm thankful for a lot of things, the number one thing I'm thankful for is my family (and my health), they tie for first place...

I've got a bit of a ridiculous collection of milk glass happening these days. Most of it I have purchased for crazy cheap prices at thrift stores, and there are a few pieces that I fell in love with that I picked up from my favorite local antique store (and paid only a little more for). Eventually I want to get some kind of cool shelf or cabinet to organize and display my collection, I just have to find the right piece of furniture. I've been thinking of opening a small online store to start selling a bunch of my extra milk glass, and other random things I've been hoarding. That is one of the goals for the new year!

Recently we moved into a rental house and we have a spare room in the basement that I have kind of half claimed as the "craft room." It's of course also packed with toys as my kids are usually in there with me, but its nice to have a space to spread out and finally start crafting again.

I was setting up a few tables in the room and as I was unpacking my craft supplies I felt a bit overwhelmed about how to organize my things. Then I had one of those "well DER" moments and remembered my random milk glass vases and dishes that I had sitting in a few boxes. So I started unpacking the milk glass and adding tapes and pens and other random supplies in them.


So you see, it all works out. I was hoarding for a reason. I just didn't really know it at the time. Happy Hoarding things you love, Happy Crafting and of course Happy Thanksgiving!


Monday, November 24, 2014

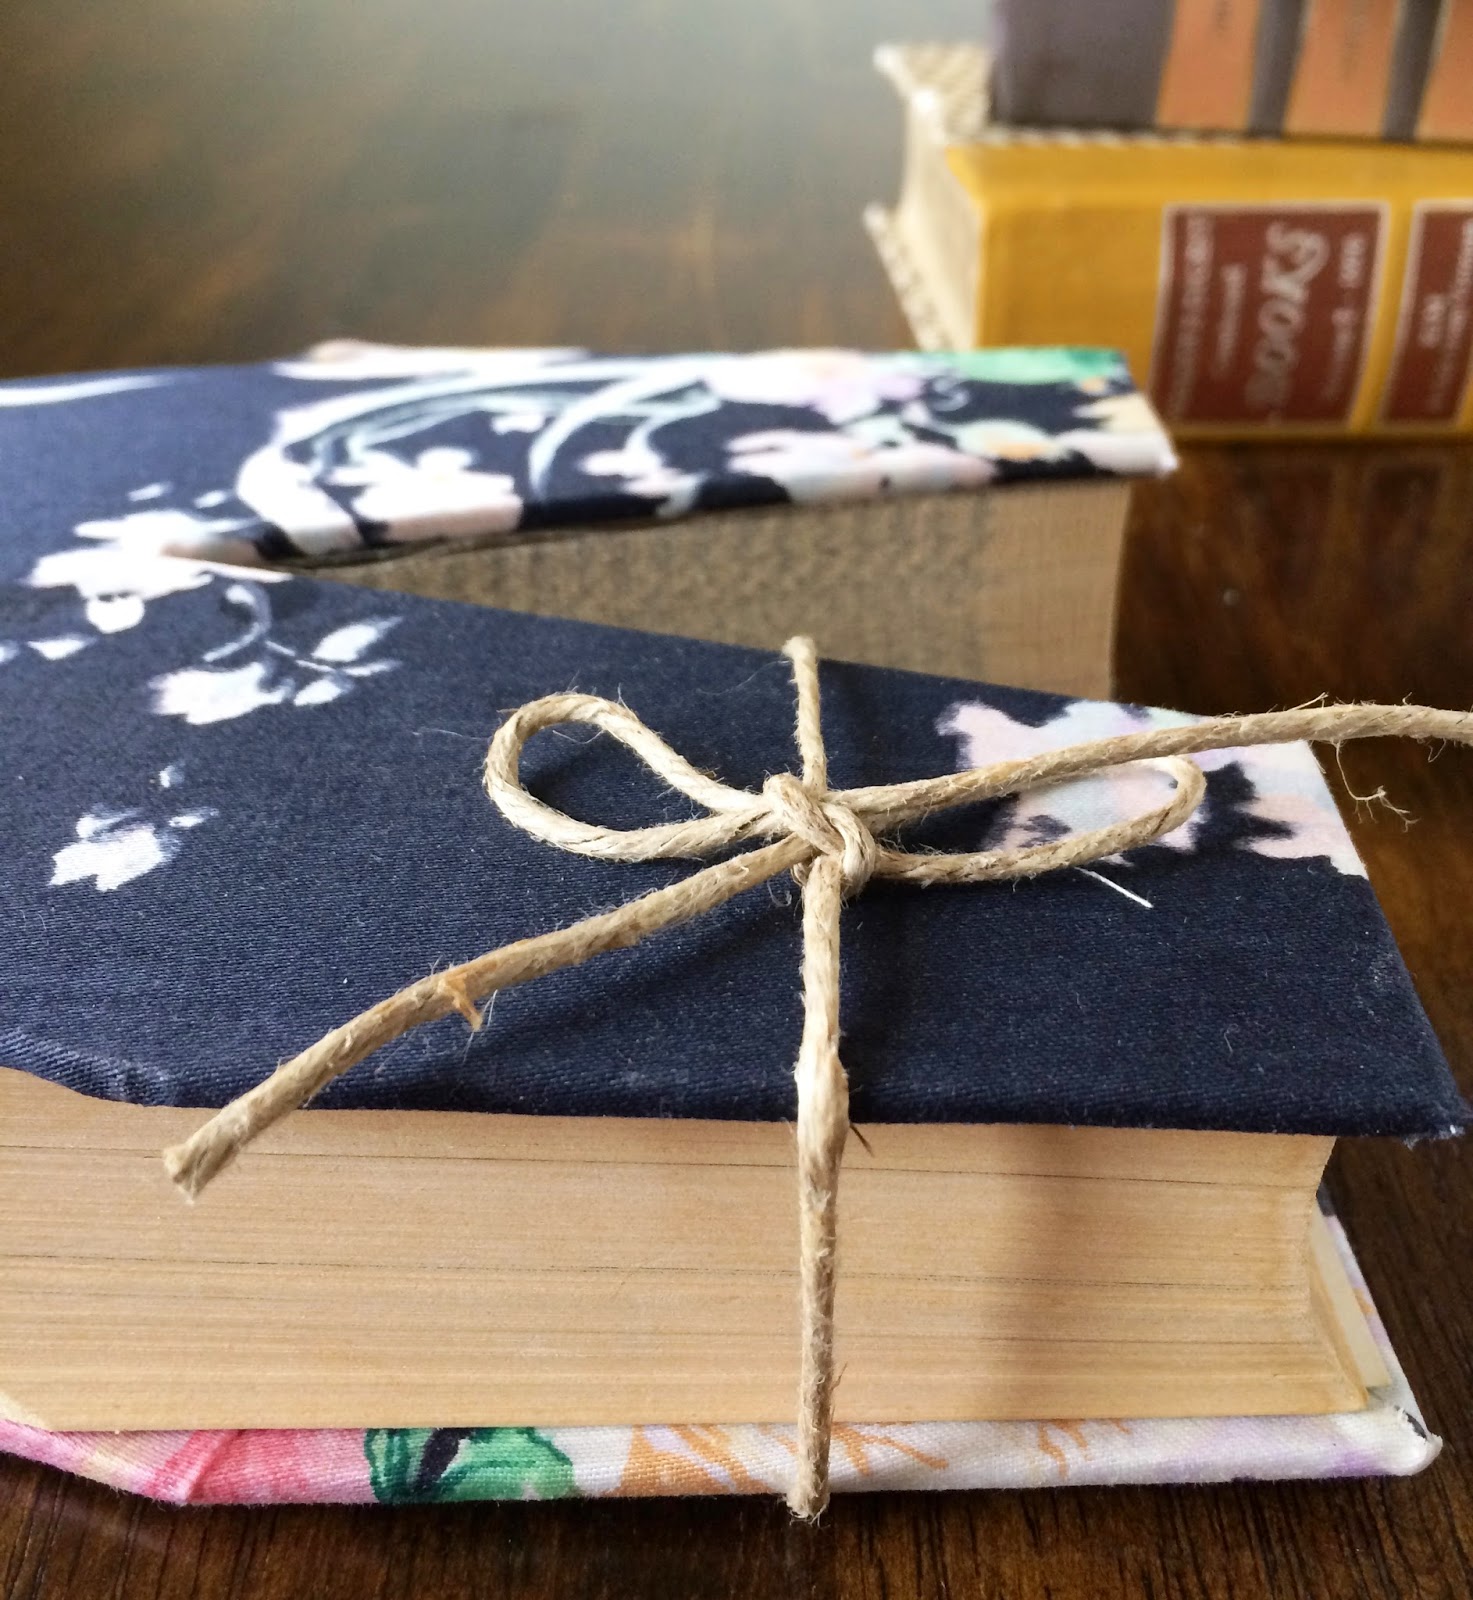
Embellish a Readers Digest Monogram Book

You have probably seen these monogram books popping up in stores. I know Anthropologie has sold them for some time and I've seen them in a number of shops. I recently received one as a gift from my good friend Sherry. Being the craft nut that I am, I decided mine needed to be embellished somehow...


I really love the simplicity of monogram books so I decided to just take it easy and not "over embellish" the book. I think they look great just nestled on a shelf or desk with a few decorative items. 


After looking through papers and a bunch of crafty things I decided to try covering the book with fabric. I had picked up a boatload of vintage fabrics at a garage sale a few years back for $2. It was seriously massive amounts of fabric in one of those enormous rubbermaid tubs. I gave a bunch of it away and have used a lot of it in various projects, like my fabric banners. I held onto some really pretty floral pieces and decided to use them for this project.

I started by tracing the book cover (front and back) onto fabric. When cutting the fabric I left approximately a 1/2 inch of fabric around the entire edge.

Using a foam brush I generously painted Mod Podge over the front cover then firmly pressed the fabric onto the cover, and then did the same with the spine and back cover. After the Mod Podge had dried, I opened the covers and snipped the fabric where there were corners. I added a little Mod Podge around the edges of the inside covers then folded the fabric over tightly.

I considered covering the inside of the covers with fabric also, but it seemed easier to just glue the first and last pages of text to the front and back covers. I figured no one is looking at the inside of the covers anyway, no big deal.


After the cover had dried, I decided to add a piece of twine around the top of the right side. The book seemed to open a little too much when it was standing upright, so it just needed something to keep it closed.


I think these book monogram letters are the perfect holiday gift idea for your bookworm friends and family. And if it needs a little something then it's really easy to embellish one yourself...


Friday, November 21, 2014

Quick and Easy Couch Pillow Covers - from Anthro Napkins

Originally these Anthropologie napkins were $8 each. The four of them would of cost $32. It's doubtful I would ever spend that much on cloth napkins since we would very rarely used them in our house. I would however, spend that much on tea towels. Anyhow, with these napkins being on major clearance at $1.95 each combined with the Anthro 15% off birthday discount, I snatched the four of them up at a great price. Yeehaw!


I love the fabric designs and knew when I purchased them that I would use them in a project instead of using them as "actual napkins" and getting them too dirty. The fabric is just too pretty to dirty them up! It turns out these napkins were a perfect match for some Ikea throw pillows I had.

I honestly didn't put a lot of effort into this project. I didn't measure anything or even use pins. All you need to do is put two napkins together with both the right sides facing inwards and then sew three edges together. Turn the pillow covers out the right way and insert the pillow. Then just hand sew some "sew on snaps" onto the open side and then snap them shut. That's all there is to it. They add a fun pop of color to my couch. So next time you see cute, clearance napkins - you know it's OK to buy them!


Tuesday, November 18, 2014

DIY Ombré Chest of Drawers

I became obsessed with the idea of an "ombré chest of drawers" after seeing a DIY on Pinterest. At the time my daughter needed a new set of drawers in her bedroom, so I decided to give it a whirl and started hunting for a cheap set of drawers on craigslist. Sure enough I found this ugly old set that was just right for this project. I know I took a "before" picture but I have searched my computer and can't find it... The chest of of drawers was really in bad shape. It was an off white color and the previous owners children had taken permanent markers to it. Like all over it.

It's important to always check second hand furniture from craigslist, garage sales and second hand stores before you put the furniture in your car. You want to be sure there are no creepy crawlies underneath or in the drawers. I used to live in California and trust me, you don't want a black widow coming home with you! There was one time I was at a garage sale and saw a guy start putting a chair in the back of his car only to realize there was a gigantic black widow living underneath it. Once you get home just give the piece a good clean, wipe it down with a mild non-toxic cleaner and if there are drawers then give them a vacuum.

Now I know the pros would always recommend stripping old paint, sanding and so on... But honestly when you're refinishing a piece of second hand furniture that you bought for $10 and you know your own kids are going to bump and scratch it, it's okay to cheat a little. It just makes sense to keep things simple when it comes to refinishing kids furniture. If it's not an antique from grandma, and not going to get a lot of "traffic" in the home then I recommend keeping it easy (and cheap). The "furniture restoration police" will not come knocking at your door if you don't do it like the pros. It's really OK.

I do however recommend a quality primer. I gave this piece two quick coats of a plain white bonding primer. Then I used blue latex paint on the front of each drawer. I only needed to do two coats on each drawer. For a project like this all you need are the small paint sample sizes from the hardware store. If you just pull the swatches you want, pick as many colors as you need (depending on how many drawers you have) and then just have an assistant at the store mix you up the small sample sizes.


For some reason I ended up with two different brands of of paint samples. I think they were out of a certain color in one of the brands at the time, so we combined two brands (Olympic and Valspar). It all worked out. Mark the top of each sample container in the order of the drawers - with 1 being the top drawer and so on. Please note - my pictures are all taken with my iPhone, and it appears that the two middle drawers are almost identical. In person its a little more obvious that they are actually different. But the difference between those two drawers is still a little too subtle, so you may want to try a more dramatic difference in shades if doing a similar project.

Once the paint has dried it is a good idea to give it a quick seal/finish. Two coats of Polycrylic works great. Since this project we have moved twice (one of those moves was from California to Utah) so the chest of drawers has been knocked around a lot and there are a few small scratches on the drawers that I need to fix. Overall it's held up really well with moving and general wear and tear.

Finally adding new hardware is always a great idea. I chose some cheap (but fun) shiny silver knobs from the Home Depot. I thought the shiny ones added a little fun pop, perfect for a kids bedroom.


Saturday, November 15, 2014

Fabric Scrap Banners

I made these fabric banners over a year ago when I was creating handmade items to sell at a school craft fair with a good friend. I wanted to use up lots of random scraps of fabric. I created a lot of banners in a few different color palettes but the yellow and orange banners were by far my favorite. 

The leftover banners had been sitting in a box for quite some time and I finally decided to pull them out and use a few to decorate the window in my sons room. We are currently renting so my decorating options are limited and I don't want to spend a fortune on temporary window treatments in a rental property. So this seemed like a great solution to brighten up a kids bedroom. 

The banners were super easy to create. I created a cardboard template for the various pennant banner shapes and then used the templates to trace onto the fabric. With a good quality pair of scissors you can easily cut a few pieces of fabric at a time. I left the edges raw (I kind of like the frayed look anyway) and just sewed the top edges over a piece of hemp twine. 

The mistake I made (but didn't really realize until I hung the banners) was that I did each banner almost identical in the order of the fabric designs. When I was sewing the banners I had piles of the cut banner pieces and would pull them in the same order when sewing each banner. So now that the three banners are hanging up, you can see in the pictures that the pennants in each banner are mostly in the same order. Not a huge deal but if I was to redo the project I would mix the pieces up so it doesn't look too uniform.

These are a quick and easy project to create, not just for fun home decor but also for decorating parties. You can also embellish them with stamped letters, ribbons and more.