
Monday, February 23, 2015
I'm a Guest Artist - Stencil Girl - Wall Art With Circle Stencils
I have another project to share with you that is featured on the Stencil Girl blog today. Hop on over to the Stencil Girl blog for more details!
Sunday, February 15, 2015
Vintage Art Deco Desk Redo
I'm really excited about this vintage art deco desk that I refinished. This project was very rewarding and I'm really digging the end result:

I snatched the desk up at the second hand store a few months ago for $10. It was in pretty bad shape, but I knew it had potential. I had been promising my daughter I would redo a desk for her bedroom. I really love the detail on this desk and would be pretty excited to come across another one as I now want one for myself. So this is exactly how it looked when I got it, no hardware and the desk had seen some pretty rough days...

We gave it a good clean and then gave it a quick sanding. For the flat surfaces I used an electric sander and then did the ornate edges by hand with a fine grit sand paper. I'm no sanding pro by any means but I certainly try to get the job done.

I used my favorite go-to primer, Zinsser Bulls Eye 123 Primer for all surfaces. Just one coat all over. Spot the cute little helper (or destroyer depending on what time of day it is).

Originally I had wanted to paint the desk plain white but my little girl had her heart set on a fun color. So we negotiated and decided on coral. Coral Passion by Valspar in a satin finish. I did two coats of the coral and then once it had dried, applied one coat of Minwax Water Based Polycrylic. I wasn't too sure about the hardware and almost went with silver, but glad I went with the brass.


I snatched the desk up at the second hand store a few months ago for $10. It was in pretty bad shape, but I knew it had potential. I had been promising my daughter I would redo a desk for her bedroom. I really love the detail on this desk and would be pretty excited to come across another one as I now want one for myself. So this is exactly how it looked when I got it, no hardware and the desk had seen some pretty rough days...
We gave it a good clean and then gave it a quick sanding. For the flat surfaces I used an electric sander and then did the ornate edges by hand with a fine grit sand paper. I'm no sanding pro by any means but I certainly try to get the job done.
I used my favorite go-to primer, Zinsser Bulls Eye 123 Primer for all surfaces. Just one coat all over. Spot the cute little helper (or destroyer depending on what time of day it is).
Originally I had wanted to paint the desk plain white but my little girl had her heart set on a fun color. So we negotiated and decided on coral. Coral Passion by Valspar in a satin finish. I did two coats of the coral and then once it had dried, applied one coat of Minwax Water Based Polycrylic. I wasn't too sure about the hardware and almost went with silver, but glad I went with the brass.
I've done a few furniture projects in the past few years but so far this is the number 1 favorite. It won't be neat and tidy like this for long, that's for sure. A certain eight year old will be covering it with pet shop toys, beenie boos, and all sorts of girly things. So I really must find another one for my bedroom soon!
Friday, January 30, 2015
I'm a Guest Artist - Stencil Girl - Porcelain Owl Plates
The lovely team at Stencil Girl Talk have featured me again as a guest artist. Head over to their blog for get a closer look at this fun project:

Wednesday, January 28, 2015
I'm a Guest Artist - Whisker Graphics - Love Treats
The lovely team at Whisker Graphics have featured me again (insert happy dance) on their blog. Hop on over to their blog for some Valentine inspiration.

Tuesday, January 20, 2015
Salvaged - Vintage Clothes Hangers
Things have been a bit crazy in my neck of the woods. My youngest has had two rounds of the flu in less than a month and there's just a lot going on (to say the least)... I've got a lot of ideas and projects in the works, but the next few weeks I'll be doing some quick and easy blog posts. I'm hoping you will still find them full of inspiration!

Today I'm sharing a few pictures of a cool way to re purpose old wooden clothes hangers. I found these ones at my local thrift store for 50 cents each. I thought about painting or embellishing them (I may eventually do that down the track) but decided to leave them as is for now.

Paired with some of my favorite black & white (printed at home) photographs that I took of my son when he was a wee one, this idea is by far the cheapest thing on my walls. You can hang these up with thumb tacks like I did, or even with a nail or decorative hook.

Today I'm sharing a few pictures of a cool way to re purpose old wooden clothes hangers. I found these ones at my local thrift store for 50 cents each. I thought about painting or embellishing them (I may eventually do that down the track) but decided to leave them as is for now.
Paired with some of my favorite black & white (printed at home) photographs that I took of my son when he was a wee one, this idea is by far the cheapest thing on my walls. You can hang these up with thumb tacks like I did, or even with a nail or decorative hook.
With the cost of the printing, paper and the 50 cent hangers, this project totals less than $2. Not bad at all!
Thursday, January 15, 2015
Recipe Post - Cranberry Walnut Feta Salad
I thought I would share one of my favorite fall/autumn salad recipes. I make this year round but the cranberries give it a bit of an autumn kick... It's so, so easy.

Chop up one head of romaine lettuce and wash and drain:

Add 1 cup of crushed walnuts (I don't crush them up too fine).

And 1 cup of dried cranberries:

1 cup of crumbled feta cheese:

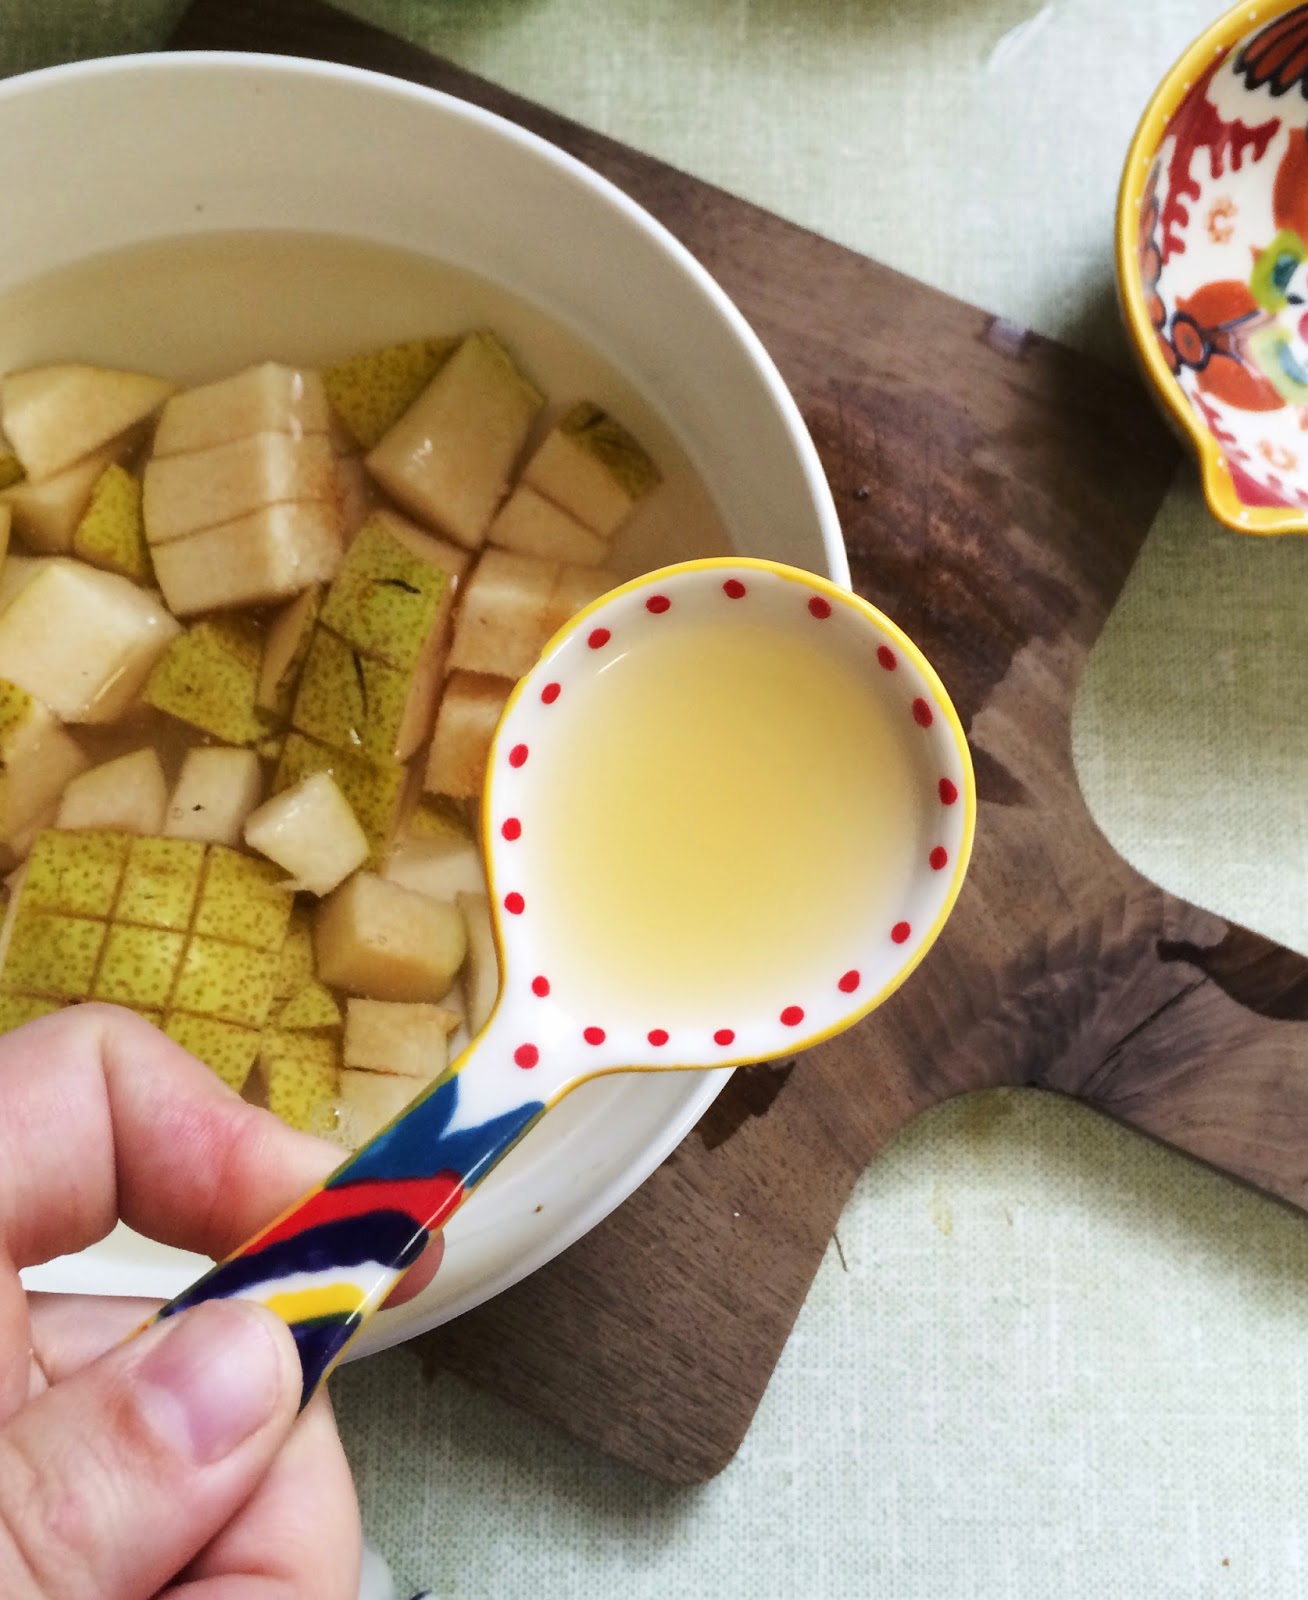
1 - 2 pears (depending on the size) and cut the pears into cubes:

Place the chopped pears in a bowl of water and add about 3 tablespoons of lemon juice and submerge them for about five minutes. This prevents the pears from turning brown:
3 rashes of turkey bacon, cooked nice and crispy and then cut up and crumbled:

For the salad dressing mix everything up in a jar or container. I used 1/4 cup of virgin olive oil, 1/4 cup of apple cider vinegar, 2 tablespoons of agave and a pinch of salt & pepper:

And that's all there is to it! You can add add chicken if you like, and you can even substitute the pears for apples. This is certainly a favorite of mine, and its a great side salad for the holidays.
Wednesday, January 7, 2015
Valentine's Day Heart Crayons for the Kids
I've made these heart crayons a number of times and they're still a favorite craft of my daughter. Plus they're a great way to use up old crayons and obviously cute to give to class friends on Valentines Day. I think they're adorable as is, but if you're feeling more ambitious and have more time then you can also easily turn them into magnets.

The most time consuming part of this craft is taking the paper off the crayons. The cheaper the crayons - the harder the paper is to get off. I used a knife to make a slit down the side of the crayon, and then just peeled it off. However, this can really easily result in cutting a finger so please be careful and absolutely don't let a child do that part. You have to be really, really careful (I can't stress that enough)... I used a small steak knife because that was the smallest one I had on hand.

Next you want to break the crayons up into tiny pieces. You don't necessarily have to sort the crayons into colors, but we did. I've found that if you melt too many colors together, the hearts can end up looking muddy. So this time around I sorted them by color (actually my little 8 year old helper did that part).
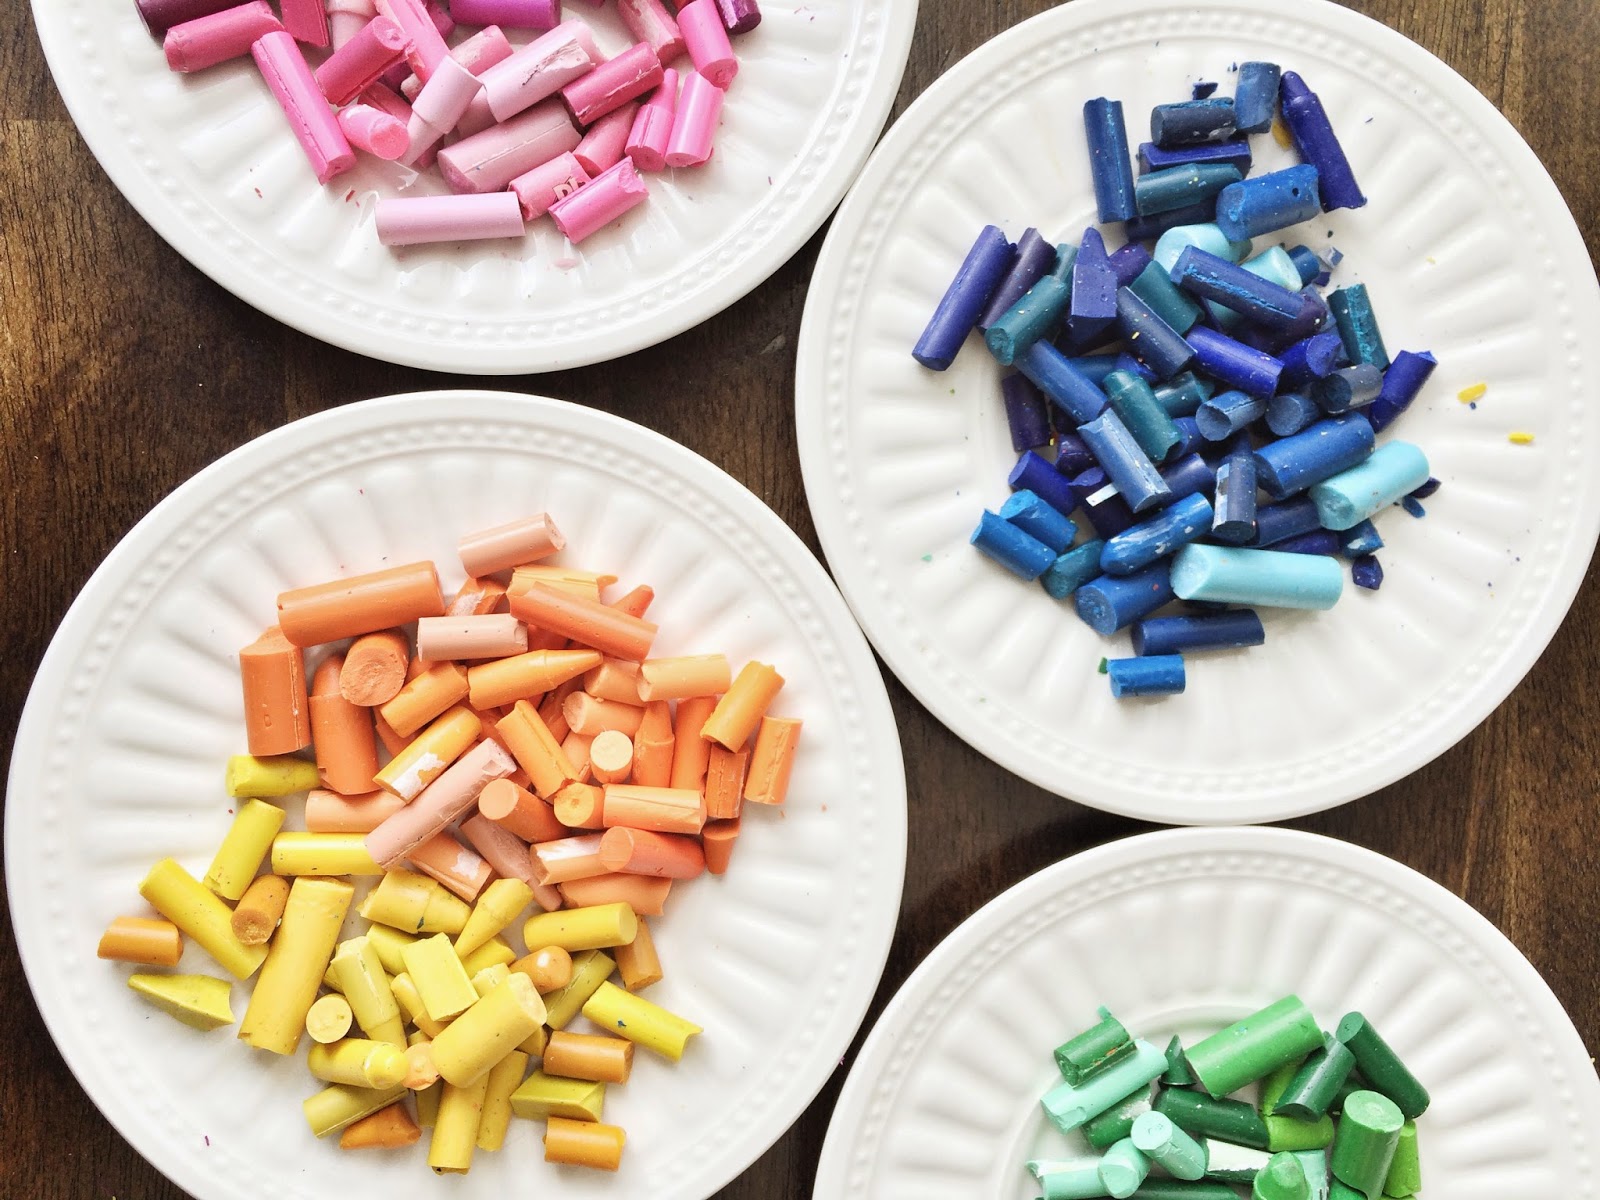
Then we filled the heart cups with fun color palettes. I used the silicone heart cups by Wilton, which I purchased at a Michael's store a few years back.

Place the heart cups on a baking sheet and bake them at 225 degrees Fahrenheit for approx 12-15 minutes. Allow them to cool for an hour before popping them out of the silicone cups. This is how they will look after they have cooled and you take them out of the silicone cups:

I thought packaging the crayons on library cards would be a good idea since these are for school friends.

So I stamped the date "Feb 14th 2015" into the date section, using an American Crafts roller stamp. Then I had my daughter hand write the names of her class mates onto the cards. You can either attach the crayons with a glue dot, or use twine to secure them to the cards.

The most time consuming part of this craft is taking the paper off the crayons. The cheaper the crayons - the harder the paper is to get off. I used a knife to make a slit down the side of the crayon, and then just peeled it off. However, this can really easily result in cutting a finger so please be careful and absolutely don't let a child do that part. You have to be really, really careful (I can't stress that enough)... I used a small steak knife because that was the smallest one I had on hand.
Next you want to break the crayons up into tiny pieces. You don't necessarily have to sort the crayons into colors, but we did. I've found that if you melt too many colors together, the hearts can end up looking muddy. So this time around I sorted them by color (actually my little 8 year old helper did that part).
Then we filled the heart cups with fun color palettes. I used the silicone heart cups by Wilton, which I purchased at a Michael's store a few years back.
Place the heart cups on a baking sheet and bake them at 225 degrees Fahrenheit for approx 12-15 minutes. Allow them to cool for an hour before popping them out of the silicone cups. This is how they will look after they have cooled and you take them out of the silicone cups:
I love how the colors really pop. We even used all those brown crayons together and they made very cool "earthy" colored hearts (you can see one on the top right in the picture above). My favorite crayon is the pink, gray and white. My daughters favorite is the red, yellow and pink:
So I stamped the date "Feb 14th 2015" into the date section, using an American Crafts roller stamp. Then I had my daughter hand write the names of her class mates onto the cards. You can either attach the crayons with a glue dot, or use twine to secure them to the cards.
These are a little time consuming and lets face it, its easier and faster to buy something at the store. But my daughter seriously loves making these and they're obviously a better alternative to candy...
Sunday, January 4, 2015
Recipe Post - Greek Salad Obsession
In addition to crafts and home decor inspired blog posts, I'm going to post the occasional recipe... I've been trying a lot of new recipes recently and very closely watching what I eat. Losing weight these past few years has not been easy. Between really fun post partum body changes, extreme stress going through a pretty major crisis, and and lets see... more stress, its been really tough. However, Im excited that since my heaviest weight that I reached, Ive lost 15 pounds. It was 20 but I just got back from a cruise and anyone thats been on a cruise - you know what Im talking about. Yikes. Ive got a long way to go to reach my goal but I'm on the right track.
I've always liked Greek salads but lately I have really, REALLY like them. I tend to get hooked on a recipe and then exhaust it. I need to learn to just make it in moderation and not make it every few days until I'm tired of it. I did that for a while with this recipe...
What I like about this Greek Salad is that I found that the few times I didn't have vinegar or lemon juice on hand it was still tasty. A lot of recipes Greek salad recipes out there call for different portions of the veggies, but this is simply what I have found works for me. I'm not a huge fan of cucumber so I don't like it to overpower my salads... So here it goes:
Chopped Greek Salad
- 5 roma tomato's
- 1 large cucumber
- 1/2 large purple onion
- 1 medium red pepper
- 1 cup pitted kalamata olives (sliced in half)
- 1 small container (4oz) of crumbled feta
- 1 teaspoon of oregano or Italian herbs
- 3 tablespoons olive oil
- 1 tablespoon of white vinegar
- 1 tablespoon of lemon juice
Chop everything into cubes, except for the onions. Cut the onions into rings if you like or smaller quartered rings like mine.
A generous teaspoon of your favorite Italian herbs, or Oregano, or even Basil if you have run out of the others...
And after that just add the oil and lemon juice and vinegar (I figured pictures of all three were unnecessary - you get the idea).
The great thing about this recipe is if you divide it into approximately 6 servings, its just 233 calories per serving. I'm going to do a post sometime soon on calorie counting, and how to make it easier if you like to cook from scratch. Enjoy!
Tuesday, December 30, 2014
I'm a Guest Artist - Whisker Graphics
I love stationery and packaging, so naturally I really love Whisker Graphics. I remember coming across their products when I was the Buyer & Shoppe Manager for Stampington and falling head over heels for their bakers twine.
I really like the simplicity of the designs and the versatility of the products. The paper bags can be used for all sorts of treats and favors or you can use them in a mixed-media scrapbook. The twine can be used to tie a parcel, hang a garland or add some whimsy to a handmade card.
However, my favorite product that they have been releasing annually is the Calendar flashcard set. If you're crafty then you need this calendar set in your life... Head over to the Whisker Graphics blog to see more pictures and info on this monthly calendar I created for 2015, featuring the Flashcard Calendar set. They are also offering the calendar at 33% off with free shipping this week, so be sure to get yours and get your calendar ready for 2015.
Friday, December 26, 2014
Little Man Accessory Board
Back in late 2012 I was in nesting and mode preparing for the arrival of my son, due in early February 2013. At the time we were living in our old house in California and I went to town decorating his nursery. Stampington & Company actually featured my sons nursery in a blog post which you can read about here.

There were a number of thrift store finds and simple DIY projects in the nursery. When we moved to Utah I sold a lot of our furniture so I no longer have the dresser and rocking chair (tears because I badly wanted to restore those), and he now sleeps in a big boy bed so his bedroom has changed a lot. I have held onto a lot of the DIY projects though, and one of my favorites are these framed pieces of fabric.

One thing that you will usually find a lot of at thrift stores are frames. They are so easy to redo with a little paint and minimal supplies. I wanted to do a small gallery wall of frames in various sizes so I chose a bunch of totally random frames. Some still had glass and some didn't, I just tossed the glass in the trash. I spray painted all the frames a solid white with a matte finish.
I used recycled cardboard from old boxes (after my baby shower I had a lot of excess cardboard boxes) and cut the pieces to size to fit each frame. I picked up a bunch of fun fabric swatches to use and then cut the pieces all to size to match the frame they were going in. You could glue the fabric onto the cardboard but that gets a little messy so I just stretched it over each piece of cardboard then secured it at the back with a little glue, and then tape. Not the most professional method but hey - it worked and projects like this are usually only temporary for me. In a year I will probably re purpose the frames into a different project.

These frames hung on the wall in my sons bedroom as is for quite some time. Recently after unpacking from our move from California to Utah I pulled them out of a box and decided to give them more of a purpose.
I saw an idea on Pinterest a few years ago where someone had created a framed board with fabric in it and used it to display accessories for a little boy (bow ties and that sort of thing). So I decided to used one of the larger frames in a similar fashion.
I suggest just using sewing pins to attach the accessories to the boards. That way it isn't permanent. Since the backing is cardboard, everything pinned on really easily. Its probably best to used pins without a pearl head like I did, that's all I had on hand. The pins without a head would be less visible. Whatever you use, just keep the frames out of reach from your little ones..

And here is the finished board, I have a couple more bow ties to add but didn't want it to look to cluttered for the purpose of the blog post...

Happy accessorizing for you little man. And I hope you are inspired to create your own little fabric board to display his little dapper accessories!

One thing that you will usually find a lot of at thrift stores are frames. They are so easy to redo with a little paint and minimal supplies. I wanted to do a small gallery wall of frames in various sizes so I chose a bunch of totally random frames. Some still had glass and some didn't, I just tossed the glass in the trash. I spray painted all the frames a solid white with a matte finish.
I saw an idea on Pinterest a few years ago where someone had created a framed board with fabric in it and used it to display accessories for a little boy (bow ties and that sort of thing). So I decided to used one of the larger frames in a similar fashion.
I suggest just using sewing pins to attach the accessories to the boards. That way it isn't permanent. Since the backing is cardboard, everything pinned on really easily. Its probably best to used pins without a pearl head like I did, that's all I had on hand. The pins without a head would be less visible. Whatever you use, just keep the frames out of reach from your little ones..
And here is the finished board, I have a couple more bow ties to add but didn't want it to look to cluttered for the purpose of the blog post...
Happy accessorizing for you little man. And I hope you are inspired to create your own little fabric board to display his little dapper accessories!
Sunday, December 21, 2014
I'm a Guest Artist - Stampington
Im excited to be featured as a guest artist on the Stampington blog Somerset Place today... If you don't know me too well then you may not know that I actually worked full time for Stampington for 7 years as their Shoppe Manager and Artist in Residence. Im no longer living in sunny California where they are, but Im still submitting art and staying active in the creative community..

So I hope you will hop on over to Somerset Place to see the GreenCrafted Gift Wrapping inspired project I did for them. I love turning really special presents into little pieces of art...
Wednesday, December 17, 2014
I'm a Guest Artist - Stencil Girl
I'm really excited to be featured as a guest blogger today over at StencilGirl Talk. I'm a big fan of StencilGirl and founder Mary Beth Shaw, and the many talented artists that design stencils for Stencil Girl. I've quickly become addicted to using stencils in crafts. I hope you will head over to their blog and take look, here's a peek....

This was a really fun project, perfect last minute gift idea also... Make sure you stop by StencilGirl Talk to check it out, and the many other amazing project ideas.
Monday, December 15, 2014
Natural Christmas Wrap Inspriation
I'm a kraft paper nut. Just a paper lover in general. I love to give gifts and I love to wrap them. A poorly wrapped present just looks well poor... And won't get the gift recipient very excited. Except for little kids. They don't seem to care much up wrapping lol.
I was wrapping these presents for a good friend and had to add a little something special. So in addition to these "brown paper packages tied up with string" I added two more simple details to each package. I slipped a mini vintage music card under the twine on each package. I found a stack of these for 50c at the thrift store. Then I attacked our little Christmas tree and clipped off some of the larger stems. I rolled them into circles and tied them onto the packages to create these mini wreaths. All done.

Theres something warm and fuzzy about these presents, including whats inside. The presents that are really fun to buy, are for the people that love exactly the same things you do.

I was wrapping these presents for a good friend and had to add a little something special. So in addition to these "brown paper packages tied up with string" I added two more simple details to each package. I slipped a mini vintage music card under the twine on each package. I found a stack of these for 50c at the thrift store. Then I attacked our little Christmas tree and clipped off some of the larger stems. I rolled them into circles and tied them onto the packages to create these mini wreaths. All done.
Saturday, December 13, 2014
Collage Salt Dough Ornaments: Merry Mooses...
I think its safe to say that the holidays really brings out the crafty kid in me... I get excited to make everything (except gingerbread houses) and I really love to make ornaments or any kind. I've used salt dough in the past to make ornaments with my daughter. I came across a few "homemade clay" recipes online recently and thought I would try them out. They basically consisted of baking soda, cornstarch and water. I did two batches and honestly wasn't too happy with how it turned out.

It just wasn't as strong as the usual salt dough and a number of our ornaments broke, so I ended up doing a third batch of ornaments but on the third (and final) batch, I instead used the salt dough. So my suggestion is just stick to your regular salt dough. Unless of course you have an amazing "no salt" foolproof, homemade clay recipe. Which by the way I would love to know about!

We did all the rolling on wax paper which helps the clean up... When we cut out all the shapes I put holes in them with a skewer so we could easily thread twine through to hang them. But since I ended up collaging the mooses with vintage sheet music paper (instead of painting them) I just put looped the twine around the antlers instead since I covered the holes.

I know a lot of people do the salt dough ornaments annually, which is a really cute way to create a small Christmas keepsake every year... You could try stamping on the year and name of the creator, or just write it on the back. Whatever you do, these are fun to do with the littles (or without lol).


Subscribe to:
Comments (Atom)